Wednesday, December 11, 2013

Tall Favor Boxes

From the Archives:

You can make two boxes from one 8.5x11-inch sheet of cardstock. These boxes are a perfect size for a handful of candy, small toys, money, notes .. just about anything you would like to gift and want a cute presentation ... you can even personalize.

I printed the watermark on the sheets before beginning. Four chocolate covered cherries in mini wrappers fit perfectly in each box. I tied a 10-inch piece of raffia on the fronts and BAM ... very easy, inexpensive gifts.


Below, these were made on a whim, experimenting with the embellishing. I used paper from a DCWV Luxury Stack. The flowers are three different size daisy punch-outs from leftover paper, glued and stacked with a bead in the center. I used a circle and square Coluzzle template to cut out the front piece(s) and covered with a piece of scrap cellophane inside.


The template is below. Use a 5.5x8.5 inch sheet of heavy cardstock. If you use a Scor-Pal, put the edge at the 3 inch and you have an exact 1-1/4 inch score mark at 4.25. Move your first score line back to the 3 and score again three more times. It doesn't matter which side of the template the 1/2" flap is located, either side will work. The flap is the first thing glued to the inside of the opposite edge when assembling the box. The only other piece to adhere is the bottom, and BAM .. your box is finished! How easy is that?


I'm a visual person, but if you like instructions here is a short version.  Score the 5.5" x8.5" sheet vertically, four times 1-1/4" apart with each score. Turn the sheet sideways and score 1-1/4" from one end and 1/2" (and 1-1/4" from that scoreline) on the other end.  The blue lines on the template are cut lines. The red dots indicate the pieces of the template that are cut and removed. I used a corner rounder punch for the top flap piece.


Glue the 1/2" flap to the inside of the opposite side. I use a tape runner, it is easy to get the flap lined up with the edge. Glue the bottom flaps down and you have a box!  It is easier than it looks, I promise


Alternate Sizes

As I did in the first photo, you can make a shorter box (less area to fill with candy :) by trimming 1" and using a 5.5x7.5 inch piece. I have also made a wider size box substituting 2" scores for the 1-1/4" measurements (again using the 1/2" flap scores). Use a 8.5" x10" inch sheet for the larger size.The cutout in the front is optional.


Have a fabulous day!

-Molly

Tuesday, December 3, 2013

Quilled Jewelry Set

I taught a quilling class at a museum in Fort Worth a couple of weeks ago and wore this jewelry set. I read that you should wear your work, I never have, so I wore this white set.

The flower is 2.25" in diameter and the earrings hang about 1.25". Sorry about the photos. I made a mistake and photographed on gray paper thinking they wouldn't show up on a white background. Click to get a better look.


I used a standard 1/4" hole punch to glue a white dot on the back center, thinking someone may look at the back. Sure enough, every person who looked at it turned it over :)


I glued a Swarovski crystal on the earrings and center of the flower for some bling. Each petal is wrapped with the English hologram edge paper. I believe I used 12" bright white strips for the individual shaped marquise.

Thanks for stopping by!
-Molly


Friday, November 22, 2013

Handmade Holiday Bookmarks

Handmade bookmarks make nice, inexpensive holiday gifts. Six 2.5" x 5.5" bookmarks can be printed on one sheet of cardstockPlace quilled elements or other 3D embellishments on the top half of the bookmark. I used a circle punch on the top corners of the middle one and a corner rounder punch on other two.


Instructions for the quilled leaves can be found on my website here: Fall Leaves


Poinsettia: red petals are 6", green leaves are 8" and center tendrils are 1/2" using bright yellow 1/16" wide.


Hanging Miniature Snowflake: 1/16" wide bright white strips, center and marquise are 1", hanger, tight rolls and closed hearts are 1.5" long.


Happy Friday!
Have a fabulous weekend. (Stay warm :)
-Molly


Friday, November 8, 2013

Olive, the Other Reindeer

I found a box I have been looking for over the past three years. It had all my prototype quilled stickers I designed that Provo Craft didn't accept. It also has three small tablets filled with all the instructions for the 64 SKUs they did accept and manufacture. I really thought that the box was accidentally lost in the move. 


The line in Rudolph, the Red-Nosed Reindeer that says 'all of the other Reindeer...', is sometimes misheard as Olive, the other Reindeer. In 1997, author Vivian Walsh wrote a children's book featuring a Jack Russell Terrier as Olive, the other Reindeer. The book was made into a film in 1999. Maybe someday, Olive will be just as much a part of the Reindeer story as Rudolph and Blitzen.


Happy Friday, have a Fabulous Weekend!
-Molly


Monday, November 4, 2013

More Miniature Quilling

Happy November! I hope your month started out wonderfully and you are making time for some crafty fun this month.

Lately, I keep wanting to grab the thin English strips and work on miniatures. I made another tiny bottle necklace but not for the store. This one is for my niece who is a cancer survivortwice! She had a total Laryngectomy earlier this year with many complications. She has adjusted very well to speaking with a prosthesis. I am so proud of her and want to surprise her with this necklace.


Three hearts, three flowers, the larger have centers on both sides - paper and Swarovski, pink ribbon with a crystal and a bit of confetti


Have a great week! xo

-Molly

Wednesday, October 2, 2013

Wednesday, September 25, 2013

Wordless Wednesday


I was looking for an Autumn photo and couldn't decide on just one. I like the mushroom. I am working on quilling a fairy mushroom house :)


What are you working on? :)

Have a great end of September!
-Molly

Sunday, August 11, 2013

Simple Back to School Quilled Card

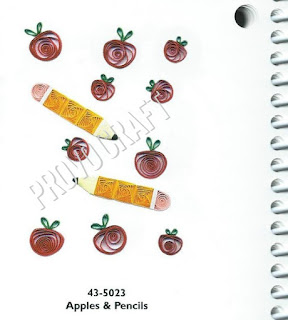
I cannot believe school starts here in two weeks. August is flying by. I should be working on my store items (I have decided to open next month) and instead, worked on this quilled card today. I used 1/8-inch strips, all 16" long. The tip of the pencil is a cone I flattened. The brown paper for the lead is 3". I crimped a silver strip for the bottom of the eraser.


This is the same pencil design of my Apples & Pencils Provo Craft stickers that are now retired.


Have a fantastic week!
-Molly

Thursday, July 25, 2013

Miniature Quilled Flowers in a Bottle Necklace


This is a necklace I made with some tiny quilled flowers and leaves using narrower than the 1/16-inch strips (paper from England). I put centers on both sides of the flowers. The sterling silver snake chain necklace is 20 inches (50cm). The bottle is about .75 inches (19mm) wide. 


Thanks for stopping by!
Molly


Monday, July 15, 2013

Gardener's Hand Scrub

I have been following the most helpful and coolest blog for a couple of weeks. It is One Good Thing by Jillee. She is writing a book and also planning a wedding so she had a week of Jillie's Best posts to free up some time. She posts every day! I was drawn to this easy sugar scrub she posted, especially after seeing she had over 700 comments. (There are many more now because she was giving away a washer and dryer the week I saw it.)

I had the sugar and Dawn so I made a few jars. EASY, EASY! And I love how it makes my hands feel after using it. 


I found some free DIY printables on Pinterest to make my presentation colorful. Lots of choices as to colors and designs.


I had some small plastic spoons that I attached a personalized handmade tag along with the ingredientsI tied to the back of the jars.


Here is the recipe and much better step-by-step photos. I just love all the pics that Jillee adds to her posts.


I hope you like Jillee's blog as much as I do.

Have a great week!
-Molly


Wednesday, July 3, 2013

From the Archives ...

Quilling Comes In All Sizes
I have said before that my two favorites are miniature and giant quilling! I would put this one below in the big category! I used one-inch crimped red and green strips of construction paper glued end to end. The stems are spongy insulation material that I cut into pieces and painted black. The leaves are 6" long and the cherries are 3.5" in diameter.


This is a piece I made to take to a CHA show in 2006 when I bought a table spot to show my designs. It is a MUST to have some type of eye-catcher to draw the manufactures and publishers to the table. My table was set up to sell my quilled cherry projects and large wall art designs. I used this cherry project, a 14-inch quilled snowflake and three 12-inch layered paper flowers as my eye-catcher. My plan worked :)

I wanted to share this technique to show that there is no limit to what you can do with quilled paper. Here are a few more examples: 

Lori Mondell ~ has an amazing creative mind when embellishing her projects (check out other items in Lori's store)
Suzana Ilic ~ brings quilling to a next level with her brilliant dimensional art
Ann Martin ~ this is an excellent example of how to be inspired by non-paper material and incorporate into quilling (also, check out Ann's new book!)


I hope you are encouraged to try something different and quill a miniature, traditional or big piece of art using your own creative style. 

Have fun!
~Molly

Update:  I found this poor photo showing how the large items are suppose to grab attention. This was the year I forgot one of my bags - containing makeup and my camera. I bought one of those disposable cameras and the photos turned out itty-shay!!!


Monday, July 1, 2013

Sour Cream Gift Container, Miniature Quilled Flowers

Happy July!

I made some 1" glass magnets, with yellow rose of Texas graphics. I wanted to wrap them but they are so small. They stack together easily held by the magnets and I wrapped them in tissue paper.


I decided to make a sour cream gift container using printed card stock. I made a tag and added tiny quilled flowers to match the paper I was using.


I used a 4" x 6" piece of card stock and rolled lengthwise into a tube as shown below. 
(10.16 cm x 15.24 cm)


I pinched the ends to close. I crimped the first end, applied glue inside along the edge, and crimped it again. After I put the magnets inside, I pinched the other end in the opposite direction. I repeated with crimping, gluing and crimping again.


I think it makes a nice presentation and this sour cream container is SO easy to make.


I purchased my graphics from Piddix. She has so many prints in many sizes and you get instant download.

Have a fantastic week!
Molly


Wednesday, June 19, 2013

Berry Boxes

click photos to enlarge


If you have stopped by before, you know that I absolutely LOVE hoarding collecting boxes and especially making them. I came across the cutest berry boxes and couldn't wait to make them last night. Before I show you my creations, I want to first give credit to Claire, the author of the blog, FellowFellow.  Her cute boxes, fabulous photos and fact sheets, in both inches and metric, can be found at the link below:


I used two-sided card stock paper from a K&Company pad. These are so easy to make (Claire has done all the measurements for you) and very sturdy. 


I used my Martha Stewart score board since it has 1/8-inch increments. So little materials and tools are needed!


I made all the top strips 1" wide and they stayed on better. I also put a bit of glue under the edge on the side opposite where it is stapled.

Thanks for stopping by!
Molly

P.S.  Made a few more. :)


Sunday, June 2, 2013

Easy Pillow Boxes

Happy June!

If you are a regular follower, you already know I love making boxes, hoarding boxes and buying boxes of boxes :) I want to stop buying expensive boxes to ship my neon paper earrings and really don't want to make the two piece boxes either. So, I thought maybe pillow boxes would work but I couldn't find my template this week.

I found this short video and free printable FTP template by Jennifer .. via Twitter.


The two things I did differently from the video:
  • I used a clear tacky glue ...easier to move and get the edges even before the glue dries.
  • I also used the edge of a metal container to score the flaps.

These were SO easy!
 I was able to print a watermark on the pink box - to personalize. 


 Thanks for looking and have a fantastic week!
 -Molly


Friday, May 24, 2013

Memorial Day Weekend

I came across these two cards recently; they are examples of cards I made for our recovering, wounded soldiers at Walter Reed Hospital. They remind me of how I used to make time to do these types of things, it was most often on a craft message board. We would do these projects as a group. I really do miss the time I had in the days before Facebook, Twitter, blah blah blah :o)  I remember getting a link from my niece saying "You have got to join this group, it is the most fun way to waste time - ever." It was Facebook! LOL I do recognize the benefits of social media, I just wish I could minimize my time on it.

 I think the hearts would look great as red and green for a holiday card.


There have been many changes over the years for sending holiday cards to patients at Walter Reed.  The information can be found here. If you are like me (slow, procrastinator) it is not too early to start on a Christmas holiday project.

Everyone ~ have a safe and fun holiday weekend. 
Happy end of May!
Molly


Monday, May 13, 2013

Miniature Quilled Paper Chocolates

The 2013 NAQGCON (North American Quilling Guild) Conference in South Bend, IN .. a few weeks ago, was so much fun that I cannot even describe! I knew it would be, but did not know how fabulous the facilities and planning (by hostess Shelly Krzyzewski Thacker)  would be. The Waterford Estates Inn was the perfect venue, huge rooms - sleeping, dining, meeting - and the three days flew by. The theme was "Sweets" and we were asked to make our own quilled name tag using the sweets theme.

I made this two-inch tray of miniature dark and white chocolates that are in Diane Boden Crane's book titled Miniature Quilling, with a few variations of my own :o)

CLICK PHOTOS TO ENLARGE


This quilled floral arrangement, created by Elaine Altmose, won 1st Place in the Free Standing category and was also voted Peoples' Choice. Yes, the vase is all quilled and the mums are quilled petals not punched leaves. 


During the awards dinner, Elaine gave her winning piece to Motoko Nakatani (Maggie) from Japan, since Maggie gave Elaine her quilled Accreditation piece last year. Maggie and two other members from Japan attended and there were two gentlemen in my class. Members from Canada and as far away as San Diego and south Florida attended. 


Elaine Altmose with her 1st Place blue ribbon and Peoples' Choice rosette ribbon and Maggie with the quilled floral arrangement, which really shows how large it is. 


This is how many items were donated for the raffle drawings. The prizes were wonderful!

When photos are released, I will post more photos and pieces that were submitted in the competition.

NAQG membership is worldwide. To join, go to NAQG.

Have a great week!
Molly


Wednesday, April 24, 2013

Wordless Wednesday .. sort of

This is a giveaway at NAQGCON next week :)


Have a fantastic day!
Molly

Wednesday, April 17, 2013

Wordless Wednesday


source: Keukenhof Gardens in the Netherlands

Sunday, April 14, 2013

Inchie Art ~ Monday

It's a Blue Monday .. in the sense of hopefully blue skies, warm bright sunshine and a great start of the week for you! I decided to work on a blue inchie art project today. I used a 4-inch paper coaster and added a little bit of quilled color.

click to enlarge

Everyone have a fantastic week! xo
-Molly


Friday, March 29, 2013

Happy Easter

On this Good Friday I would like to wish everyone a Happy and Blessed Easter.


The bottom layer is 1/8" bright white paper strips. On the top layer, I used a silver holofoil edge on white paper imported from England. I added several Swarovski crystal rhinestones.

This cross pattern is copyright of Malinda Johnston in her book The Book of Paper Quilling (Sterling Publishing, Lark, 1994).  I love the look of all the eccentric shapes. The instructions can be found on page 81.

Molly


Wednesday, March 20, 2013

Happy Spring!

I am so glad that Spring is finally here. I know some of you are having a winter spring and I am hoping you see warm sunshine soon!

Happy Spring to you :)


Sunday, March 10, 2013

Glass Bead Dangle Earrings

I got into my small glass beads last week and made some dangle earrings. These are fast and easy to make using six bead links and jump ring. Glass beads are so fun to wear!

click photos to enlarge

citrine, red and green are 4x6mm faceted rondelle
clear crystal are 3x5mm faceted rondelle
aqua are 6mm faceted round 


fishhook earwire
5mm jump ring
5 - 1" 21ga headpins
1 - 2" 21ga headpin
11/0 clear seed beads
10 glass beads
jewelry making tools

(make two :)


I used one or two seed beads between the beads as shown.
This is the order that I placed them on the jump ring (see below).


Videos, tutorials and instructions on how to open a jump ring, earwire and make a loop are HERE.

I get ALL my jewelry tools, materials, supplies, beads, findings from Fire Mountain Gems.


I keep all my pin pieces that are 1" or longer. This was left from cutting the 2-inch headpin and perfect for making a bead charm.


This is the completed pair just in time for St. Patrick's Day!

Have a great week!
-Molly